Анализ сайта с помощью screaming frog seo spider
Содержание:
- 5) Improved UX Bits
- Small Update – Version 9.1 Released 8th March 2018
- 3) Resume Previously Lost or Crashed Crawls
- 2) View & Audit URLs Blocked By Robots.txt
- Web Scraping & Data Extraction Using The SEO Spider Tool
- Small Update – Version 11.2 Released 9th April 2019
- Зачем нужны парсеры
- Интерфейс
- 3) Change Detection
- 4) Improved Custom Extraction – Multiple Values & Functions
- Результаты тестирования 22 веб-краулеров
- 2) Auditing Redirects In A Migration
- Как спарсить карту сайта в SEO Screaming Frog: руководство
- Other Smaller Updates
- 4) Exclude Pages From The XML Sitemap
- 4) Security Checks
- Other Updates
- Small Update – Version 10.2 Released 3rd October 2018
- Установка программы
- 3) Indexability & Indexability Status
- Интерфейс и в использовании
5) Improved UX Bits
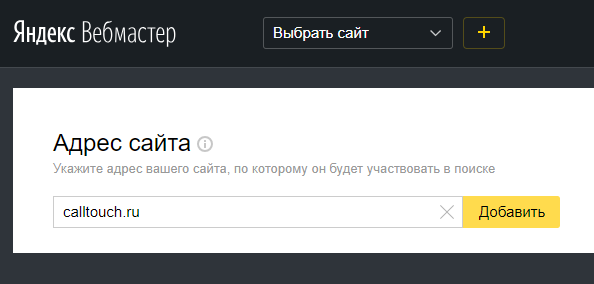
We’ve found some new users could get confused between the ‘Enter URL to spider’ bar at the top, and the ‘search’ bar on the side. The size of the ‘search’ bar had grown, and the main URL bar was possibly a little too subtle.
So we have adjusted sizing, colour, text and included an icon to make it clearer where to put your URL.
If that doesn’t work, then we’ve got another concept ready and waiting for trial.
The ‘Image Details’ tab now displays a preview of the image, alongside its associated alt text. This makes image auditing much easier!
You can highlight cells in the higher and lower windows, and the SEO Spider will display a ‘Selected Cells’ count.
The lower windows now have filters and a search, to help find URLs and data more efficiently.
Site visualisations now have an improved zoom, and the tree graph nodes spacing can be much closer together to view a site in its entirety. So pretty.
Oh, and in the ‘View Source’ tab, you can now click ‘Show Differences’ and it will perform a diff between the raw and rendered HTML.
Small Update – Version 9.1 Released 8th March 2018
We have just released a small update to version 9.1 of the SEO Spider. This release is mainly bug fixes and small improvements –
- Monitor disk usage on user configured database directory, rather than home directory. Thanks to Mike King, for that one!
- Stop monitoring disk usage in Memory Storage Mode.
- Make sitemap reading support utf-16.
- Fix crash using Google Analytics in Database Storage mode.
- Fix issue with depth stats not displaying when loading in a saved crawl.
- Fix crash when viewing Inlinks in the lower window pane.
- Fix crash in Custom Extraction when using xPath.
- Fix crash when embedded browser initialisation fails.
- Fix crash importing crawl in Database Storage Mode.
- Fix crash when sorting/searching main master view.
- Fix crash when editing custom robots.txt.
- Fix jerky scrolling in View Source tab.
- Fix crash when searching in View Source tab.
3) Resume Previously Lost or Crashed Crawls
Due to the feature above, you’re now able to resume from an otherwise ‘lost’ crawl in database storage mode.
Previously if Windows had kindly decided to perform an update and restart your machine mid crawl, there was a power-cut, software crash, or you just forgot you were running a week-long crawl and switched off your machine, the crawl would sadly be lost forever.
We’ve all been there and we didn’t feel this was user error, we could do better! So if any of the above happens, you should now be able to just open it back up via the ‘File > Crawls’ menu and resume the crawl.
Unfortunately this can’t be completely guaranteed, but it will provide a very robust safety net as the crawl is always stored, and generally retrievable – even when pulling the plug directly from a machine mid-crawl.
2) View & Audit URLs Blocked By Robots.txt
You can now view URLs disallowed by the robots.txt protocol during a crawl.
Disallowed URLs will appear with a ‘status’ as ‘Blocked by Robots.txt’ and there’s a new ‘Blocked by Robots.txt’ filter under the ‘Response Codes’ tab, where these can be viewed efficiently.

The ‘Blocked by Robots.txt’ filter also displays a ‘Matched Robots.txt Line’ column, which provides the line number and disallow path of the robots.txt entry that’s excluding each URL. This should make auditing robots.txt files simple!
Historically the SEO Spider hasn’t shown URLs that are disallowed by robots.txt in the interface (they were only available via the logs). I always felt that it wasn’t required as users should know already what URLs are being blocked, and whether robots.txt should be ignored in the configuration.
However, there are plenty of scenarios where using robots.txt to control crawling and understanding quickly what URLs are blocked by robots.txt is valuable, and it’s something that has been requested by users over the years. We have therefore introduced it as an optional configuration, for both internal and external URLs in a crawl. If you’d prefer to not see URLs blocked by robots.txt in the crawl, then simply untick the relevant boxes.
URLs which are linked to internally (or externally), but are blocked by robots.txt can obviously accrue PageRank, be indexed and appear under search. Google just can’t crawl the content of the page itself, or see the outlinks of the URL to pass the PageRank onwards. Therefore there is an argument that they can act as a bit of a dead end, so I’d recommend reviewing just how many are being disallowed, how well linked they are, and their depth for example.
Web Scraping & Data Extraction Using The SEO Spider Tool
This tutorial walks you through how you can use the Screaming Frog SEO Spider’s custom extraction feature, to scrape data from websites.
The custom extraction feature allows you to scrape any data from the HTML of a web page using CSSPath, XPath and regex. The extraction is performed on the static HTML returned from URLs crawled by the SEO Spider, which return a 200 ‘OK’ response. You can switch to mode to extract data from the rendered HTML.
To jump to examples click one of the below links:
To get started, you’ll need to download & install the SEO Spider software and have a licence to access the custom extraction feature necessary for scraping. You can download via the buttons in the right hand side bar.
When you have the SEO Spider open, the next steps to start extracting data are as follows –
Small Update – Version 11.2 Released 9th April 2019
We have just released a small update to version 11.2 of the SEO Spider. This release is mainly bug fixes and small improvements –
- Update to schema.org 3.5 which was released on the 1st of April.
- Update splash screen, so it’s not always on top and can be dragged.
- Ignore HTML inside amp-list tags.
- Fix crash in visualisations when focusing on a node and using search.
- Fix issue with ‘Bulk Export > Queued URLs’ failing for crawls loaded from disk.
- Fix issue loading scheduling UI with task scheduled by version 10.x.
- Fix discrepancy between master and detail view Structured Data warnings when loading in a saved crawl.
- Fix crash parsing RDF.
- Fix ID stripping issue with Microdata parsing.
- Fix crashing in Google Structured Data validation.
- Fix issue with JSON-LD parse errors not being shown for pages with multiple JSON-LD sections.
- Fix displaying of Structured Data values to not include escape characters.
- Fix issue with not being able to read Sitemaps containing a BOM (Byte Order Mark).
- Fix Forms based Authentication so forms can be submitted by pressing enter.
- Fix issue with URLs ending ?foo.xml throwing off list mode.
- Fix GA to use URL with highest number of sessions when configuration options lead to multiple GA URLs matching.
- Fix issue opening crawls via .seospider files with ++ in their file name.
Зачем нужны парсеры
Парсер — это программа, сервис или скрипт, который собирает данные с указанных веб-ресурсов, анализирует их и выдает в нужном формате.
С помощью парсеров можно делать много полезных задач:
Для справки. Есть еще серый парсинг. Сюда относится скачивание контента конкурентов или сайтов целиком. Или сбор контактных данных с агрегаторов и сервисов по типу Яндекс.Карт или 2Гис (для спам-рассылок и звонков). Но мы будем говорить только о белом парсинге, из-за которого у вас не будет проблем.
Где взять парсер под свои задачи
Есть несколько вариантов:
- Оптимальный — если в штате есть программист (а еще лучше — несколько программистов). Поставьте задачу, опишите требования и получите готовый инструмент, заточенный конкретно под ваши задачи. Инструмент можно будет донастраивать и улучшать при необходимости.
- Воспользоваться готовыми облачными парсерами (есть как бесплатные, так и платные сервисы).
- Десктопные парсеры — как правило, программы с мощным функционалом и возможностью гибкой настройки. Но почти все — платные.
- Заказать разработку парсера «под себя» у компаний, специализирующихся на разработке (этот вариант явно не для желающих сэкономить).
Первый вариант подойдет далеко не всем, а последний вариант может оказаться слишком дорогим.
Что касается готовых решений, их достаточно много, и если вы раньше не сталкивались с парсингом, может быть сложно выбрать. Чтобы упростить выбор, мы сделали подборку самых популярных и удобных парсеров.
Законно ли парсить данные?
В законодательстве РФ нет запрета на сбор открытой информации в интернете. Право свободно искать и распространять информацию любым законным способом закреплено в четвертом пункте 29 статьи Конституции.
Допустим, вам нужно спарсить цены с сайта конкурента. Эта информация есть в открытом доступе, вы можете сами зайти на сайт, посмотреть и вручную записать цену каждого товара. А с помощью парсинга вы делаете фактически то же самое, только автоматизированно.
Интерфейс
Итак, всё начинается с поля «Enter URL to spider», куда вводится название сайта и жмётся кнопка «Start».
Понятное дело, что она запускает сканирование сайта, а когда оно завершится, мы можем приступать к анализу. И тут мы сразу получаем первые минусы по сравнению с PageWeight — нельзя задать локальный (то есть свой) роботс. В принципе, исключить разделы из сканирования можно через Configuration — Exclude, но это уже не так удобно. Впрочем, познакомимся с интерфейсом и возможностями программы.
Сначала может ввести в ступор, что в списке страниц будет куча изображений, но их можно моментально отсечь — либо выбрав фильтр HTML (кстати кнопка Export отвечает за экспорт текущих результатов из главного окна в Excel, можно даже в xlsx):
Либо переключившись на HTML в сайдбаре, оба варианта оставят в основном окне программы только собственно HTML страницы:
В последней версии (3.0 на момент написания статьи) появилась возможность выстроить структуру сайта. Таким образом можно, к примеру, изучить структуру конкурентов перед созданием своего сайта.
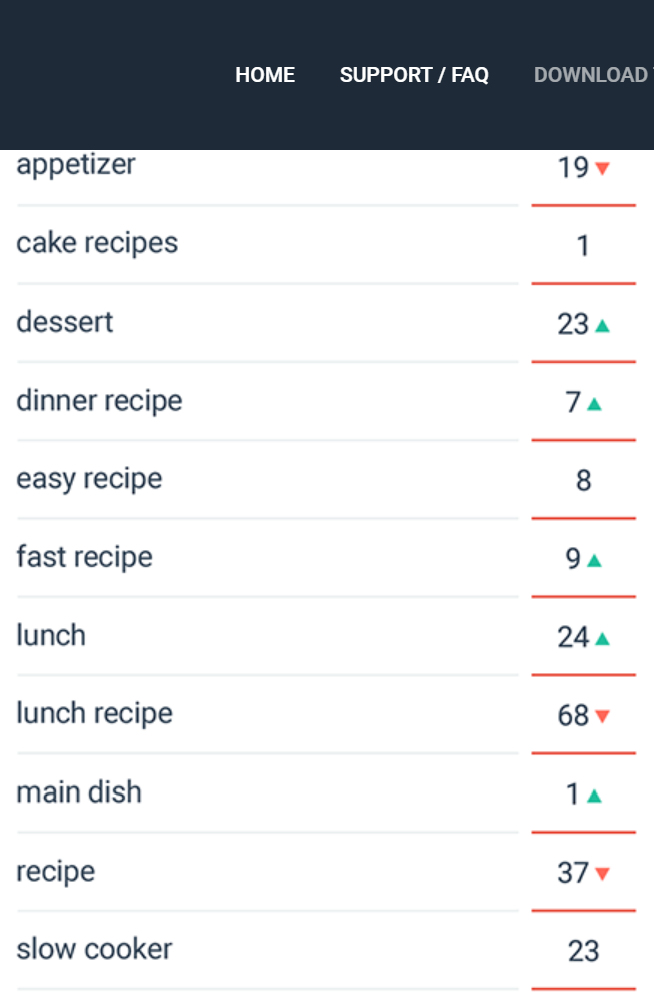
Заметьте, что у каждой вкладки программы есть свои собственные фильтры. Вы можете выбрать, например, только страницы, отдающие 301 редирект и выгрузить их в Excel. На вкладке URI вы можете выбрать урлы, чья длина больше 115 символов, урлы с нижним подчеркиванием вместо дефиса (фильтр Underscores), дубли страниц (Duplicate), урлы с параметрами (Dynamic). На вкладке Title — выбрать те тайтлы, чья длина больше 65 символов или меньше 30, совпадающие с H1 на странице, отсутствующие. На вкладке Images — все изображения больше 100 килобайт, без тега alt. Ну и так далее.
Столбцы в основном окне перемещаются по принципу Drag and Drop, так что можно переместить наиболее важные из них ближе к левой части окна и сохранить настройки через File — Default Config — Save Current.
При нажатии на название столбца происходит сортировка. Среди столбцов есть не совсем обычные:
- Title 1 Lenght — длина Title
- Title 1 Pixel Width — ширина Title в пикселях
- Level — это уровень вложенности.
- Word Сount — количество слов между тегами body.
- Size — вес страницы в байтах.
- Inlinks — количество внутренних ссылок на страницу.
- Outlinks — количество внутренних ссылок со страницы.
- External Outlinks — количество внешних ссылок со страницы. Поспорьте с пацанами, кто угадает, какое наибольшее количество ссылок со страницы размещает тот или иной сапа-сайт. Если один угадает, а второй нет — то второй покупает ссылку на свой сайт с этой страницы.
- Response Time — время загрузки страницы.
Также внизу есть окно с более подробной информацией о странице. Так, SERP Snippet показывает, как, по оценке программы, будет выглядеть сниппет в Google. Полезно, если вы заморачиваетесь, чтобы Title в выдаче выглядел кликабельнее.
Когда в окне кликаете правой кнопкой мыши на строку нужного урла, открывается контекстное меню, из которого наиболее важным пунктом является Open in Browser — открыть в браузере.
Также удобно будет выделить с помощью shift часть урлов и удалить их через Remove. Не с сайта, конечно, а из результатов сканирования. А то бы я давно с пары сайтов кое-каких чертей урлы бы поудалял…
Также с помощью контекстного меню можно проверить наличие страницы в индексе Гугла, Яху и Бинга, посмотреть бэклинки через сервисы типа Majestic SEO или Ahrefs, открыть кэш Гугла или найти страницу в Вебархиве. Ну еще роботс глянуть и проверить код страницы на наличие ошибок. Контекстное меню на всех вкладках одинаковое.
3) Change Detection
While the overview tab is able to identify most key changes between crawls, it doesn’t tell you if an element or key metric has changed – such as a page title, word count, crawl depth, internal links, structured data and more.
It will only tell you if, for example, a page title is now ‘Over X Characters’ or ‘Missing’ based upon the parameters defined within filters. Keeping on top of these kinds of changes is vital as it can make such a big difference in ranking.
So you’re also able to compare all of these within the SEO Spider to see exactly what has changed in the new ‘Change Detection’ tab.

This can be super useful when checking on the implementation of SEO recommendations (has the client really updated those page titles and meta descriptions?), or when monitoring a website where you can now be alerted to changes that perhaps you weren’t expecting!
Another important use-case is parity checks, such as comparing Mobile Vs Desktop, or JavaScript Vs Non-JavaScript crawls for differences.
Mike King recently wrote an excellent piece on the importance and complexities of parity issues (and shared a handy free tool called Parito to aid the process). Our new change detection feature will help perform the heavy lifting for parity checks and find differences at scale.
When in ‘Compare’ mode, you can click on the compare configuration via the cog at the top (or ‘Config > Compare’) and select which metrics you’re interested in identifying changes.

When you have clicked ‘Compare’ and the analysis has run, the ‘Change Detection’ tab becomes available and shows what has changed in granular detail.
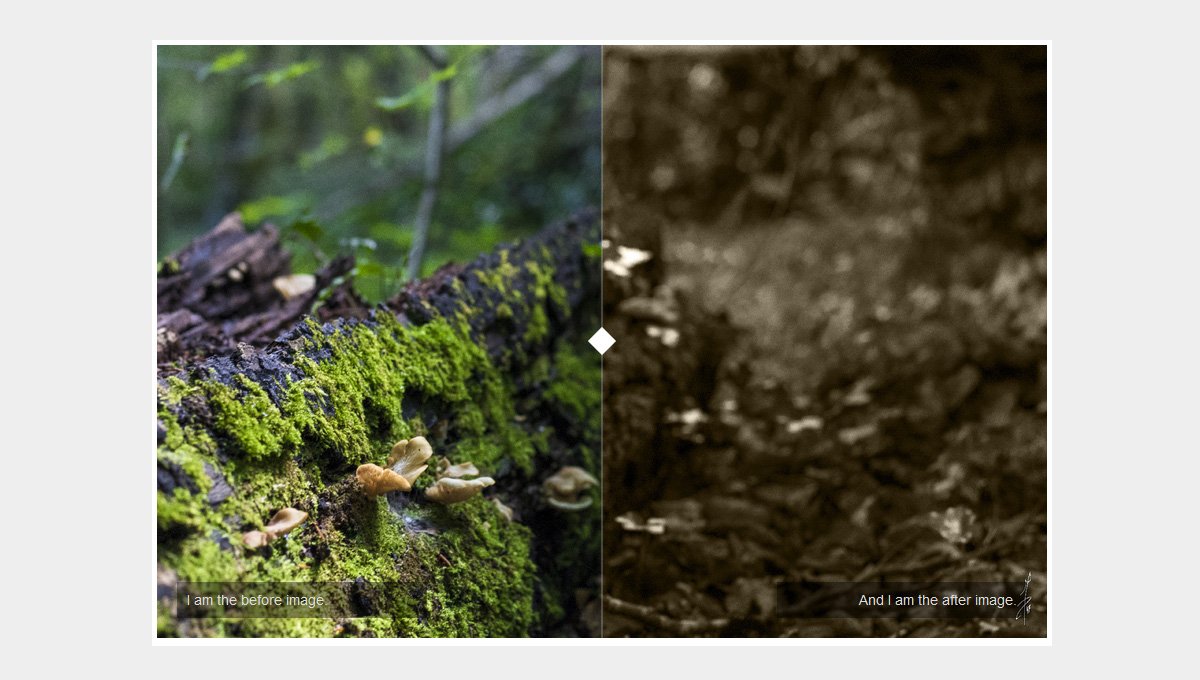
You’re able to click on an element and view the changes in the master window, such as for page titles where you can see current and previous page titles side-by-side and review how they have changed.

We all know how important internal linking can be, and this feature can help alert you to pages that have suddenly lost unique internal links.

You can also keep an eye on pages that the content team are improving –

Or have changed in crawl depth –

Another cool feature is that you’re able to adjust the new filter on the lower window to see what’s changed to better understand the ‘why’. So if crawl depth has changed to ‘1’ from ‘3’ between crawls like the above example, you can select ‘inlinks’ at the bottom, and then ‘Added’ to see any new inlinks.

In the above example, the current crawl was a JavaScript enabled crawl, and previous was crawling the raw HTML. So this has helped identify that the homepage has links to the portfolio page which use client-side JavaScript.
The ‘Content’ change detection option requires you to store the HTML of the page in a crawl (‘Config > Spider > Extraction > Store HTML & Store Rendered HTML’) and this analysis takes a little longer to run using the minhash algo. This feature can approximate the page change % from the previous to the current crawl based upon your configured main content area.

In this example, our version 14 blog post has changed in content by 1% between the crawls.
You can click on the lower window ‘View Source’ tab, select ‘compare’ and ‘show differences’ to highlight what has changed in the HTML.

It’s relatively trivial to add more elements to change detection, so do let us know if there’s anything else you’d like to see included here.
4) Improved Custom Extraction – Multiple Values & Functions
We listened to feedback that users often wanted to extract multiple values, without having to use multiple extractors. For example, previously to collect 10 values, you’d need to use 10 extractors and index selectors (, etc) with XPath.
We’ve changed this behaviour, so by default, a single extractor will collect all values found and report them via a single extractor for XPath, CSS Path and Regex. If you have 20 hreflang values, you can use a single extractor to collect them all and the SEO Spider will dynamically add additional columns for however many are required. You’ll still have 9 extractors left to play with as well. So a single XPath such as –
Will now collect all values discovered.
You can still choose to extract just the first instance by using an index selector as well. For example, if you just wanted to collect the first h3 on a page, you could use the following XPath –
Functions can also be used anywhere in XPath, but you can now use it on its own as well via the ‘function value’ dropdown. So if you wanted to count the number of links on a page, you might use the following XPath –
I’d recommend reading our updated guide to web scraping for more information.
Результаты тестирования 22 веб-краулеров
После многочисленных тестов нами были получены такие результаты:
| Программа | Время на скан 100 страниц | Время на скан 1 000 страниц | Время на скан 10 000 страниц | Время на скан 100 000 страниц | Широкий набор аудируемых параметров | Гибкая фильтрация данных | Сканирование произвольных URL | Расчет Page Rank | Визуализация данных на графе | Freeware |
| Screaming Frog SEO Spider | 0:00:08 | 0:00:45 | 0:05:35 | 1:03:30 | + | — | + | — | + | — |
| Netpeak Spider | 0:00:04 | 0:00:30 | 0:04:53 | 0:55:11 | + | + | + | + | + | — |
| SiteAnalyzer | 0:00:06 | 0:00:22 | 0:06:47 | 2:04:36 | + | + | + | + | + | + |
| Forecheck | 0:00:15 | 0:01:12 | 0:08:02 | 1:36:14 | + | — | + | — | — | — |
| Sitebulb | 0:00:08 | 0:01:26 | 0:16:32 | 2:47:54 | + | — | + | — | + | — |
| WebSite Auditor | 0:00:07 | 0:00:40 | 0:05:56 | 2:36:26 | + | — | — | — | + | — |
| Comparser | 0:00:12 | — | — | — | — | — | + | — | — | — |
| Visual SEO Studio | 0:00:15 | 0:02:24 | 0:24:14 | 4:08:47 | — | — | — | — | — | — |
| Xenu | 0:00:12 | 0:01:22 | 0:14:41 | 2:23:32 | — | — | — | — | — | + |
| Darcy SEO Checker | 0:00:04 | 0:00:31 | 0:05:40 | 0:58:45 | — | — | — | — | — | — |
| LinkChecker | 0:00:29 | 0:00:52 | 0:03:22 | 0:52:04 | — | — | — | — | — | + |
| PageWeight Desktop | 0:00:06 | 0:00:56 | 0:17:40 | 4:23:15 | — | — | — | + | — | — |
| Beam Us Up | 0:00:08 | 0:01:03 | 0:10:18 | 1:43:03 | — | — | — | — | — | + |
| Webbee | 0:00:10 | 0:01:58 | — | — | — | — | — | — | — | — |
| WildShark SEO spider | 0:00:28 | 0:07:20 | — | — | — | — | — | — | — | + |
| Site Visualizer | 0:00:11 | 0:01:58 | 0:38:15 | — | — | — | — | — | — | — |
| RiveSolutions SEO Spider | 0:00:06 | 0:00:49 | 0:08:14 | 1:55:19 | — | — | — | — | — | — |
| IIS SEO Toolkit | 0:00:03 | 0:00:46 | 0:07:08 | 1:02:26 | — | — | — | — | — | + |
| Website Link Analyzer | 0:00:09 | 0:02:38 | 0:24:56 | 4:33:41 | — | — | — | — | — | + |
| A1 Website Analyzer | 0:00:24 | 0:05:32 | 0:53:15 | 8:42:11 | — | — | — | — | — | + |
| seoBOXX WebsiteAnalyser | 0:00:12 | 0:01:15 | 0:17:31 | 3:51:08 | — | — | — | — | — | — |
| Smart SEO Auditor | 0:04:46 | — | — | — | — | — | — | — | — | — |
Примечание: на сканировании 100 и 1 000 страниц нет смысла сильно заострять внимание в виду разницы алгоритмов обхода краулерами страниц у разных программ. А вот скорость сканирования 10 000 и 100 000 страниц уже показательна, так как отражает более-менее стабильную скорость работы краулеров на дальней дистанции
2) Auditing Redirects In A Migration
This is by some distance my personal favourite feature due to the amount of time it has saved.
I used to find it a pain to audit redirects in a site (and, or domain) migration, checking to ensure a client had set-up permanent 301 redirects from their old URLs, to the correct new destination.
Hence, we specifically built a feature which allows you to upload a list of your old URLs, crawl them and follow any redirect chains (with the ‘always follow redirects’ tickbox checked), until the final target URL is reached (with a no response, 2XX, 4XX or 5XX etc) and map them out in a single report to view.
This report does not just include URLs which have redirect chains, it includes every URL in the original upload & the response in a single export, alongside the number of redirects in a chain or whether there are any redirect loops.
Click on the tiny incomprehensible image below to view a larger version of the redirect mapping report, which might make more sense (yes, I set-up some silly redirects to show how it works!) –
You can read more about this feature in our ‘How to audit redirects in a site migration‘ guide.
Как спарсить карту сайта в SEO Screaming Frog: руководство
Задача сеошника — проанализировать Sitemap на наличие ошибок и оптимизировать под поисковые системы, чтобы в карте сайте были только качественные веб-страницы, открыты для поиска. И именно эти страницы потом должны появляться в результатах поисковой выдачи (SERP). Особенностью программы SEO Screaming Frog является то, что она позволит просканировать даже все внутренние xml-файлы, чего иногда не удается сделать в разных онлайн-сервисах.
Итак, теперь перейдем к руководству.
1. Запустите программу Screaming Frog и перейдите в меню Confuguration -> Spider. Затем на вкладке Crawl перейдите вниз к разделу XML Sitemaps и поставьте чекбокс «Crawl Linked XML Sitemaps» и «Crawl These Sitemaps» («Auto Discover XML Sitemap» — отключаем). Станет доступным текстовое поле, вставьте в него URL-адрес Sitemap карты сайта и нажмите ОК:

2. Вставьте URL-адрес основного домена в поле для поиска «Enter URL to spider» и нажмите «Start» — запустится автоматическое сканирование:

3. Теперь перейдите в меню Crawl Analysis и выберите пункт Configure. В открывшемся окне оставьте включенным только чекбокс «Sitemaps». Нажмите ОК, чтобы сохранить изменения и перейдите еще раз в Crawl Amalysis и нажмите Start — программа Screaming Frog выполнит аудит XML-карты сайта:

Также, спарсить XML-карту сайта можно более простым способом: отдельно через меню Mode -> List и потом нажать на кнопку Upload -> Download XML Sitemap. В появившимся окне ввести URL карты сайта и нажать ОК.

Screaming Frog покажет сколько спарсил веб-страниц, нажмите ОК:

Other Smaller Updates
We have also made a large number of other updates, these include the following –
- A ‘‘ configuration option (which is ticked by default) has been included, so the user can decide whether they want to actually crawl canonicals or just reference them.
- Added new Googlebot for Smartphones user-agent and retired the Googlebot-Mobile for Smartphones UA. Thanks to Glenn Gabe for the reminder.
- The ‘Advanced Export’ has been renamed to ‘‘. ‘‘ has been moved under a ‘Sitemaps’ specific navigation item.
- Added a new ‘No Canonical’ filter to the directives tab which helps view any html pages or PDFs without a canonical.
- Improved performance of .xlsx file writing to be close to .csv and .xls
- ‘Meta data’ has been renamed to ‘Meta Robots’.
- The SEO Spider now always supplies the Accept-Encoding header to work around several sites that are 404 or 301’ing based on it not being there (even though it’s not actually a requirement…).
- Allow user to cancel when uploading in list mode.
- Provide feedback in stages when reading a file in list mode.
- Max out Excel lines per sheet limits for each format (65,536 for xls, and 1,048,576 for xlsx).
- The lower window ‘URL info’ tab now contains much more data collected about the URL.
- ‘All links’ in the ‘Advanced Export’ has been renamed to ‘All In Links’ to provide further clarity.
- The UI has been lightened and there’s a little more padding now.
- Fixed a bug where empty alt tags were not being picked up as ‘missing’. Thanks to the quite brilliant Ian Macfarlane for reporting it.
- Fixed a bug upon some URLs erroring upon upload in list mode. Thanks again to Fili for that one.
- Fixed a bug in the custom filter export due to the file name including a colon as default. Oops!
- Fixed a bug with images disappearing in the lower window pane, when clicking through URLs.
I believe that’s everything! I really hope you like all the new features and improvements listed above. We still have so much planned and in our development queue, so there is plenty more to come as well.
As always, thank you all for your on-going support and feedback. Please do let us know about any bugs, issues or if there are any other features you’d like to see in the tool. Thanks all.
4) Exclude Pages From The XML Sitemap
Outside of the above configuration options, there might be additional ‘internal’ HTML 200 response pages that you simply don’t want to include within the XML Sitemap.
For example, you shouldn’t include ‘duplicate’ pages within a sitemap. If a page can be reached by two different URLs, for example http://example.com and http://www.example.com (and they both resolve with a ‘200’ response), then only a single preferred canonical version should be included in the sitemap. You shouldn’t include URLs with session ID’s (you can use the feature to strip these during a crawl), there might be some URLs with lots of parameters that are not needed, or just sections of a website which are unnecessary.
There’s a few ways to make sure they are not included within the XML Sitemap –
- If there are sections of the website or URL paths that you don’t want to include in the XML Sitemap, you can simply them in the configuration pre-crawl. As they won’t be crawled, they won’t be included within the ‘internal’ tab or the XML Sitemap.
- If you have already crawled URLs which you don’t want included in the XML Sitemap export, then simply highlight them in the ‘internal tab’ in the top window pane, right click and ‘remove’ them, before creating the XML sitemap.
- Alternatively you can export the ‘internal’ tab to Excel, filter and delete any URLs that are not required and re-upload the file in , before generating the XML sitemap.
4) Security Checks
The ‘Protocol’ tab has been renamed to ‘‘ and more up to date security-related checks and filters have been introduced.
While the SEO Spider was already able to identify HTTP URLs, mixed content and other insecure elements, exposing them within filters helps you spot them more easily.

You’re able to quickly find mixed content, issues with insecure forms, unsafe cross-origin links, protocol-relative resource links, missing security headers and more.
The old insecure content report remains as well, as this checks all elements (canonicals, hreflang etc) for insecure elements and is helpful for HTTPS migrations.
The new security checks introduced are focused on the most common issues related to SEO, web performance and security, but this functionality might be extended to cover additional security checks based upon user feedback.
Other Updates
Version 15.0 also includes a number of smaller updates and bug fixes, outlined below.
- Math Solvers and Practice Problems Google rich result features are now supported in structured data validation.
- There’s a new ‘Crawl Timestamp’ column in the Internal tab, which should help with automation, reporting and debugging.
- Project folders within the ‘File > Crawls’ menu are now collapsed by default.
- The URL bar will now default to HTTPS if you don’t specify the protocol.
- Fixed a blurry interface issue on high resolution screens on both Windows and Linux (for any scaling setting).
- Fixed many bugs that are too monotonous to include in any detail. You’re not even reading this last bullet point, so why am I writing it?
That’s all for now. We think these features help raise the SEO Spider to a new level, so hopefully, you find them useful. Please see our tutorial on ‘How To Compare Crawls‘ for more on how to use all the features released above. If you experience any issues, please let us know via support and we’ll help.
Thank you to everyone for all their feature requests, feedback, and continued support.
Now, go and download version 15.0 of the Screaming Frog SEO Spider and let us know what you think!
Small Update – Version 10.2 Released 3rd October 2018
We have just released a small update to version 10.2 of the SEO Spider. This release is mainly bug fixes and small improvements –
- –headless can now be run on Ubuntu under Windows.
- Added configuration option “Respect Self Referencing Meta Refresh” (Configuration > Spider > Advanced). Lots of websites have self-referencing meta refereshes, which can be classed as ‘non-indexable’, and this can now simply be switched off.
- URLs added to the crawl via GA/GSC now got through URL rewriting and exclude configuration.
- Various scheduling fixes.
- The embedded browser now runs in a sandbox.
- The Force-Directed Diagram directory tree now considers non-trailing slash URLs as potential directories, and doesn’t duplicate where appropriate.
- Fix bug with ‘Custom > Extraction’ filter missing columns when run headless.
- Fix issue preventing crawls saving with more than 32k of custom extraction data.
- Fix issue with ‘Link Score’ not being saved/restored.
- Fix crash when accessing the Forms Based Authentiction.
- Fix crash when uploading duplicate SERP URLs.
- Fix crashes introduced by update to macOS 10.14 Mojave.
Установка программы
Скачать программу нужно на сайте автора: https://netpeaksoftware.com/ru/spider.
Установка простая и быстрая. Язык выбираем русский. После открытия программы нужно пройти регистрацию. Это тоже бесплатно. После регистрации вы получите на указанный почтовый ящик ключ авторизации. Вводим ключ и работаем.
- Вписываем URL исследуемого сайта. Жмем старт;
- После анализа манипулируем кнопками и смотрим анализ по нужному параметру;
- Фильтры результатов анализа достаточно разнообразны и понятны. Жмете на кнопки, списки перестраиваются;
- Что приятно, есть визуальная раскраска результатов. Удобно;
- Показ дублей страниц заказываем справа внизу. Дубли показываются по повторяющемуся тексту и показывают URL, где дубли присутствуют;
- Результаты анализа можно сохранить файлом Excel. В отличае от программы XENU повторно открыть файл в программе нельзя.
3) Indexability & Indexability Status
This is not the third biggest feature in this release, but it’s important to understand the concept of we have introduced into the SEO Spider, as it’s integrated into many old and new features and data.
Every URL is now classified as either ‘Indexable‘ or ‘Non-Indexable‘.

These two phrases are now commonplace within SEO, but they don’t have an exact definition. For the SEO Spider, an ‘Indexable’ URL means a page that can be crawled, responds with a ‘200’ status code and is permitted to be indexed.
This might differ a little from the search engines, which will index URLs which can’t be crawled and content that can’t be seen (such as those blocked by robots.txt) if they have links pointing to them. The reason for this is for simplicity, it helps to bucket and organise URLs into two distinct groups of interest.
Each URL will also have an indexability status associated with it for quick reference. This provides a reason why a URL is ‘non-indexable’, for example, if it’s a ‘Client Error’, ‘Blocked by Robots.txt, ‘noindex’, ‘Canonicalised’ or something else (and perhaps a combination of those).
This was introduced to make auditing more efficient. It makes it easier when you export data from the internal tab, to quickly identify which URLs are canonicalised for example, rather than having to run a formula in a spreadsheet. It makes it easier at a glance to review whether a URL is indexable when reviewing page titles, rather than scanning columns for canonicals, directives etc. It also allows the SEO Spider to use a single filter, or two columns to communicate a potential issue, rather than six or seven.
Интерфейс и в использовании
SEO Spider работает на любом компьютере под управлением Windows, Mac или Ubuntu. Независимо от того, с каким изданием вы работаете, установка будет относительно быстрой и безболезненной.
В целом, интерфейс SEO Spider может показаться немного сложным для пользователей, которые никогда раньше не работали с инструментом SEO-анализа. Однако, несмотря на объем представленной информации, все продумано до мелочей, и даже новички должны чувствовать себя комфортно с этим программным обеспечением через пару часов..
Как только установка будет завершена, вы должны быть готовы выполнить свой первый поиск сканирования.
Под верхней строкой меню вы увидите область URL-адресов. После того, как вы подключили свой сайт здесь, просто нажмите «Пуск». Затем инструмент будет искать каждую ссылку, найденную на вашей домашней странице, и открывать их для анализа. Пока ваш сайт настроен правильно, SEO Spider должен находить все ваши публичные страницы.

(Изображение предоставлено: SEO Spider)
Главный экран SEO Spider настроен так, чтобы вы могли легко увидеть ключевые результаты, которые были получены при сканировании вашего сайта. Например, на вкладке «H1» вы сможете увидеть список основных заголовков, используемых на каждой из страниц вашего сайта. На первый взгляд, это может выявить, если вы пропустили теги H1 или дублируете заголовки, которые могут нанести ущерб эффективности SEO вашего сайта..