Анимация на css3 (transition, transform, animation)
Содержание:
- Event transitionend
- Run Animation in Reverse Direction or Alternate Cycles
- Delay an Animation
- Examples
- CSS Reference
- CSS Properties
- Property Values
- CSS transitions
- Chasing circles
- Which Properties You Can Animate using CSS Animations
- CSS Reference
- CSS Properties
- Fun mouse effect
- How to make the best-animated websites? Pick the right animation tools!
- Animation properties
- Рассинхронизируйте все движения
- Добавляйте псевдо-хвостики
- CSS-переходы
Event transitionend
When the CSS animation finishes the event triggers.
It is widely used to do an action after the animation is done. Also we can join animations.
For instance, the ship in the example below starts to sail there and back when clicked, each time farther and farther to the right:
The animation is initiated by the function that re-runs each time the transition finishes, and flips the direction:
The event object for has a few specific properties:
- The property that has finished animating. Can be good if we animate multiple properties simultaneously.
- The time (in seconds) that the animation took, without .
Run Animation in Reverse Direction or Alternate Cycles
The property specifies
whether an animation should be played forwards, backwards or in alternate
cycles.
The animation-direction property can have the following values:
-
— The animation is played as normal
(forwards). This is default -
— The animation is played in
reverse direction (backwards) -
— The animation is played
forwards first, then backwards -
— The animation is played
backwards first, then forwards
The following example will run the animation in reverse direction (backwards):
Example
div {
width: 100px; height: 100px;
position: relative; background-color: red;
animation-name: example;
animation-duration: 4s; animation-direction:
reverse;}
The following example uses the value «alternate» to make the animation
run forwards first, then backwards:
Example
div {
width: 100px; height: 100px;
position: relative; background-color: red; animation-name: example; animation-duration: 4s; animation-iteration-count: 2; animation-direction:
alternate;}
The following example uses the value «alternate-reverse» to make the animation
run backwards first, then forwards:
Example
div { width: 100px; height: 100px;
position: relative; background-color: red; animation-name: example; animation-duration: 4s; animation-iteration-count: 2; animation-direction:
alternate-reverse;}
Delay an Animation
The property specifies a delay for the start of an animation.
The following example has a 2 seconds delay before starting the animation:
Example
div {
width: 100px; height: 100px;
position: relative; background-color: red; animation-name: example;
animation-duration: 4s; animation-delay: 2s;}
Negative values are also allowed. If using negative values, the animation
will start as if it had already been playing for N seconds.
In the following example, the animation will start as if it had already been
playing for 2 seconds:
Example
div {
width: 100px; height: 100px;
position: relative; background-color: red;
animation-name: example;
animation-duration: 4s; animation-delay: -2s;}
Examples
In the following example, we’re going to create a falling effect for a piece of text using CSS animations. The text will “swing” and fall down by rotating it using CSS transforms and then fading it out by animating its opacity.
In the keyframes set, we’re going to start with the initial position of the text, when it’s neither transformed nor faded out:
@keyframes fall {
    from {
        transform: rotate(0) translateX(0);
        opacity: 1;
    }
    /* ... */
}
We know that we want the text to be rotated by 90 degrees at the end of the animation, translated downwards and faded out..
@keyframes fall {
    from {
        transform: rotate(0) translateX(0);
        opacity: 1;
    }
    /* ... */
    to {
        transform: rotate(90deg) translateX(200px);
        opacity: 0;
    }
}
By specifying only these two keyframes, this is how the animation looks so far:
View this demo on the Codrops Playground
As you can see, the fall doesn’t look very realistic. We need the text to rotate first so that it looks like it’s going to fall, by attaching only its left edge to the initial position, and then have it fall down (translate) and fade out from there. We need to control the intermediate steps of the animation, so we’ll specify the rotation and position of the text during the animation using more keyframes.
We want the element to rotate first, and then after rotating we can allow it to fall down by moving to the last keyframe directly. So we can add one more step (keyframe) where we rotate the element, but don’t translate it and don’t fade it out:
@keyframes fall {
    from {
        transform: rotate(0) translateX(0);
        opacity: 1;
    }
    50%, 60% {
        transform: rotate(90deg) translateX(0);
        opacity: 1;
    }
    to {
        transform: rotate(90deg) translateX(200px);
        opacity: 0;
    }
}
Depending on the effect you’re after, the intermediate keyframe can be at ‘50%’ or any other percentage. Sometimes all you have to do is experiment and play with the values to see how it changes the animation. And sometimes a little math can do. In this example, we expect the text to rotate before it falls down, stays a little bit in the “hanging” position, and then fall down. Here is the result of applying the intermediate keyframe to the animation:
View this demo on the Codrops Playground
We can make the effect more realistic by changing the speed and timing function by which each keyframe animates. We’re going to use the timing function to specify a custom easing that adds a “swinging” effect to the text right before it falls down. We’ll add that timing function to the keyframe selector declaration block because we want it to be applied to the animation when the element is moving from its initial position to its rotated “hanging” position. Similarly, we’re also going to add a timing function to the animation between the intermediate and the final keyframes that makes the falling down appear faster and more realistic.
We’re also going to add one more keyframe at ‘85%’ to make the dropping and fading effect be applied earlier in the cycle, and a keyframe at ‘15%’ because otherwise the element will start the animation instantly and we wouldn’t be able to see its initial state. So our final looks like this:
@keyframes fall {
    from, 15% {
        transform: rotate(0) translateX(0);
        opacity: 1;
        animation-timing-function: cubic-bezier(.07,2.02,.67,.57);
    }
    50%, 60% {
        transform: rotate(90deg) translateX(0);
        opacity: 1;
        animation-timing-function: cubic-bezier(.13,.84,.82,1);
    }
    85%, to {
        transform: rotate(90deg) translateX(200px);
        opacity: 0;
    }
}
The result of the above keyframe rules is the following. Try playing with the keyframe percentage values and easing functions to get a better feel of how the animation is controlled by them and how you can create your own effects.
CSS Reference
CSS ReferenceCSS Browser SupportCSS SelectorsCSS FunctionsCSS Reference AuralCSS Web Safe FontsCSS Font FallbacksCSS AnimatableCSS UnitsCSS PX-EM ConverterCSS ColorsCSS Color ValuesCSS Default ValuesCSS Entities
CSS Properties
align-content
align-items
align-self
all
animation
animation-delay
animation-direction
animation-duration
animation-fill-mode
animation-iteration-count
animation-name
animation-play-state
animation-timing-function
backface-visibility
background
background-attachment
background-blend-mode
background-clip
background-color
background-image
background-origin
background-position
background-repeat
background-size
border
border-bottom
border-bottom-color
border-bottom-left-radius
border-bottom-right-radius
border-bottom-style
border-bottom-width
border-collapse
border-color
border-image
border-image-outset
border-image-repeat
border-image-slice
border-image-source
border-image-width
border-left
border-left-color
border-left-style
border-left-width
border-radius
border-right
border-right-color
border-right-style
border-right-width
border-spacing
border-style
border-top
border-top-color
border-top-left-radius
border-top-right-radius
border-top-style
border-top-width
border-width
bottom
box-decoration-break
box-shadow
box-sizing
break-after
break-before
break-inside
caption-side
caret-color
@charset
clear
clip
clip-path
color
column-count
column-fill
column-gap
column-rule
column-rule-color
column-rule-style
column-rule-width
column-span
column-width
columns
content
counter-increment
counter-reset
cursor
direction
display
empty-cells
filter
flex
flex-basis
flex-direction
flex-flow
flex-grow
flex-shrink
flex-wrap
float
font
@font-face
font-family
font-feature-settings
font-kerning
font-size
font-size-adjust
font-stretch
font-style
font-variant
font-variant-caps
font-weight
gap
grid
grid-area
grid-auto-columns
grid-auto-flow
grid-auto-rows
grid-column
grid-column-end
grid-column-gap
grid-column-start
grid-gap
grid-row
grid-row-end
grid-row-gap
grid-row-start
grid-template
grid-template-areas
grid-template-columns
grid-template-rows
hanging-punctuation
height
hyphens
@import
isolation
justify-content
@keyframes
left
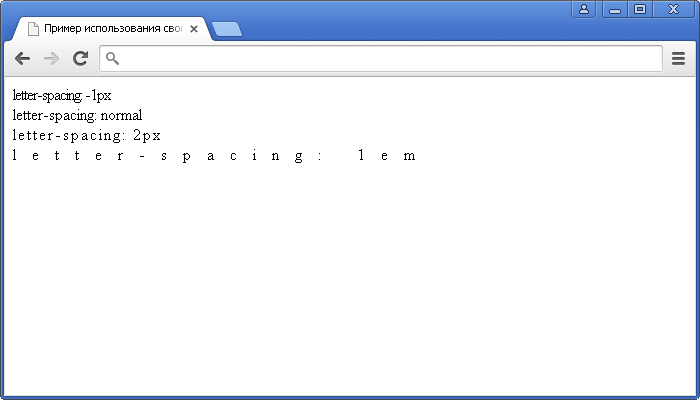
letter-spacing
line-height
list-style
list-style-image
list-style-position
list-style-type
margin
margin-bottom
margin-left
margin-right
margin-top
max-height
max-width
@media
min-height
min-width
mix-blend-mode
object-fit
object-position
opacity
order
outline
outline-color
outline-offset
outline-style
outline-width
overflow
overflow-x
overflow-y
padding
padding-bottom
padding-left
padding-right
padding-top
page-break-after
page-break-before
page-break-inside
perspective
perspective-origin
pointer-events
position
quotes
resize
right
row-gap
scroll-behavior
tab-size
table-layout
text-align
text-align-last
text-decoration
text-decoration-color
text-decoration-line
text-decoration-style
text-indent
text-justify
text-overflow
text-shadow
text-transform
top
transform
transform-origin
transform-style
transition
transition-delay
transition-duration
transition-property
transition-timing-function
unicode-bidi
user-select
vertical-align
visibility
white-space
width
word-break
word-spacing
word-wrap
writing-mode
z-index
Property Values
| Value | Description |
|---|---|
| animation-name | Specifies the name of the keyframe you want to bind to the selector |
| animation-duration | Specifies how many seconds or milliseconds an animation takes to complete |
animation-timing-function |
Specifies the speed curve of the animation |
| animation-delay | Specifies a delay before the animation will start |
animation-iteration-count |
Specifies how many times an animation should be played |
| animation-direction | Specifies whether or not the animation should play in reverse on alternate cycles |
| animation-fill-mode | Specifies what values are applied by the animation outside the time it is executing |
| animation-play-state | Specifies whether the animation is running or paused |
| initial | Sets this property to its default value. Read about initial |
| inherit | Inherits this property from its parent element. Read about inherit |
CSS transitions
Идея проста. Мы указываем, что некоторое свойство будет анимироваться при помощи специальных CSS-правил. Далее, при изменении этого свойства, браузер сам обработает анимацию.
Например, CSS, представленный ниже, 3 секунды анимирует свойство .
Теперь любое изменение фонового цвета будет анимироваться в течение 3х секунд.
При клике на эту кнопку происходит анимация её фона:
Есть всего 5 свойств, задающих анимацию:
Далее мы изучим их все, пока лишь заметим, что общее свойство может перечислять их все, в порядке: , а также задавать анимацию нескольких свойств сразу.
Например, при клике на эту кнопку анимируются одновременно цвет и размер шрифта:
Далее мы рассмотрим свойства анимации по отдельности.
Chasing circles
- Author: Steven Roberts
The animated loading icon is made up of four circles. The circles have no fill, but have alternating stroke-colours.
In our CSS, we can set some basic properties to all of our circles and then use the :nth-of-type selector to apply a different stroke-dasharray to each circle.
Next, we need to create our keyframe animation. Our animation is really simple: all we need to do is to rotate the circle by 360 degrees. By placing our transformation at the 50% mark of the animation, the circle will also rotate back to its original position.
With our animation created, we now just need to apply it to our circles. We set the animation name; duration; iteration count and timing function. The ‘ease-in-out’ will give the animation a more playful feel.
At the moment, we have our loader, but all of the elements are rotating together at the same time. To fix this, we’ll apply some delays. We’ll create our delays using a Sass for loop.
Due to the delays, our circle now animates in turn, creating the illusion of the circles chasing each other. The only problem with this is that when the page first loads, the circles are static, then they start to move, one at a time. We can achieve the same offset effect, but stop the unwanted pause in our animation by simply setting the delays to a negative value.
Next page: More CSS animation examples to explore
Which Properties You Can Animate using CSS Animations
A lot! They are the same you can animate using CSS Transitions, too.
Here’s the full list:
| Property |
|---|
| background |
| background-color |
| background-position |
| background-size |
| border |
| border-color |
| border-width |
| border-bottom |
| border-bottom-color |
| border-bottom-left-radius |
| border-bottom-right-radius |
| border-bottom-width |
| border-left |
| border-left-color |
| border-left-width |
| border-radius |
| border-right |
| border-right-color |
| border-right-width |
| border-spacing |
| border-top |
| border-top-color |
| border-top-left-radius |
| border-top-right-radius |
| border-top-width |
| bottom |
| box-shadow |
| caret-color |
| clip |
| color |
| column-count |
| column-gap |
| column-rule |
| column-rule-color |
| column-rule-width |
| column-width |
| columns |
| content |
| filter |
| flex |
| flex-basis |
| flex-grow |
| flex-shrink |
| font |
| font-size |
| font-size-adjust |
| font-stretch |
| font-weight |
| grid-area |
| grid-auto-columns |
| grid-auto-flow |
| grid-auto-rows |
| grid-column-end |
| grid-column-gap |
| grid-column-start |
| grid-column |
| grid-gap |
| grid-row-end |
| grid-row-gap |
| grid-row-start |
| grid-row |
| grid-template-areas |
| grid-template-columns |
| grid-template-rows |
| grid-template |
| grid |
| height |
| left |
| letter-spacing |
| line-height |
| margin |
| margin-bottom |
| margin-left |
| margin-right |
| margin-top |
| max-height |
| max-width |
| min-height |
| min-width |
| opacity |
| order |
| outline |
| outline-color |
| outline-offset |
| outline-width |
| padding |
| padding-bottom |
| padding-left |
| padding-right |
| padding-top |
| perspective |
| perspective-origin |
| quotes |
| right |
| tab-size |
| text-decoration |
| text-decoration-color |
| text-indent |
| text-shadow |
| top |
| transform. |
| vertical-align |
| visibility |
| width |
| word-spacing |
| z-index |
Download my free CSS Handbook
CSS Reference
CSS ReferenceCSS Browser SupportCSS SelectorsCSS FunctionsCSS Reference AuralCSS Web Safe FontsCSS Font FallbacksCSS AnimatableCSS UnitsCSS PX-EM ConverterCSS ColorsCSS Color ValuesCSS Default ValuesCSS Entities
CSS Properties
align-content
align-items
align-self
all
animation
animation-delay
animation-direction
animation-duration
animation-fill-mode
animation-iteration-count
animation-name
animation-play-state
animation-timing-function
backface-visibility
background
background-attachment
background-blend-mode
background-clip
background-color
background-image
background-origin
background-position
background-repeat
background-size
border
border-bottom
border-bottom-color
border-bottom-left-radius
border-bottom-right-radius
border-bottom-style
border-bottom-width
border-collapse
border-color
border-image
border-image-outset
border-image-repeat
border-image-slice
border-image-source
border-image-width
border-left
border-left-color
border-left-style
border-left-width
border-radius
border-right
border-right-color
border-right-style
border-right-width
border-spacing
border-style
border-top
border-top-color
border-top-left-radius
border-top-right-radius
border-top-style
border-top-width
border-width
bottom
box-decoration-break
box-shadow
box-sizing
break-after
break-before
break-inside
caption-side
caret-color
@charset
clear
clip
clip-path
color
column-count
column-fill
column-gap
column-rule
column-rule-color
column-rule-style
column-rule-width
column-span
column-width
columns
content
counter-increment
counter-reset
cursor
direction
display
empty-cells
filter
flex
flex-basis
flex-direction
flex-flow
flex-grow
flex-shrink
flex-wrap
float
font
@font-face
font-family
font-feature-settings
font-kerning
font-size
font-size-adjust
font-stretch
font-style
font-variant
font-variant-caps
font-weight
gap
grid
grid-area
grid-auto-columns
grid-auto-flow
grid-auto-rows
grid-column
grid-column-end
grid-column-gap
grid-column-start
grid-gap
grid-row
grid-row-end
grid-row-gap
grid-row-start
grid-template
grid-template-areas
grid-template-columns
grid-template-rows
hanging-punctuation
height
hyphens
@import
isolation
justify-content
@keyframes
left
letter-spacing
line-height
list-style
list-style-image
list-style-position
list-style-type
margin
margin-bottom
margin-left
margin-right
margin-top
max-height
max-width
@media
min-height
min-width
mix-blend-mode
object-fit
object-position
opacity
order
outline
outline-color
outline-offset
outline-style
outline-width
overflow
overflow-x
overflow-y
padding
padding-bottom
padding-left
padding-right
padding-top
page-break-after
page-break-before
page-break-inside
perspective
perspective-origin
pointer-events
position
quotes
resize
right
row-gap
scroll-behavior
tab-size
table-layout
text-align
text-align-last
text-decoration
text-decoration-color
text-decoration-line
text-decoration-style
text-indent
text-justify
text-overflow
text-shadow
text-transform
top
transform
transform-origin
transform-style
transition
transition-delay
transition-duration
transition-property
transition-timing-function
unicode-bidi
user-select
vertical-align
visibility
white-space
width
word-break
word-spacing
word-wrap
writing-mode
z-index
Fun mouse effect
This is a fun effect that follows your mouse around. It could be useful when you want to draw attention to an element on your page.
We need very little HTML for this effect:
First, we position the demo and set perspective for our 3D transform:
Then style the div we want to animate:
Here we set a background, then we set overflow to hidden so that we can add a sheen effect later. We also set css variables, sheenX and sheenY.
These sheen variables will help position the sheen effect. We use them in our card’s after pseudo-element:
Here we’re making sure the pseudo-element is bigger than the container. This will give us something to slide around on top of the card using transform.
The transform property is making use of those CSS variables we set earlier. We will set those with JavaScript. Let’s set up the JavaScript to first listen for mouse events:
document.onmousemove = handleMouseMove;
We now need a handleMouseMove function to handle onmousemove:
Our function takes the window height and width and creates an angle on the X and Y axes. We then set these to the transform style of our card. This gives the card an angle based on the mouse!
We next call a function to set the pseudo-element’s position:
Our pseudo-element looks best when it moves in the opposite direction to the mouse. To achieve this we create a number between -0.5 and 0.5 that changes in the opposite direction by calculating the ratio by -1.
We multiply this number by 800 as we want it to scale up to a maximum of 400px, which is how far we set the sheen pseudo-element outside the card.
Lastly we set these offset values to our CSS variable properties, and the browser’s renderer does the rest.
We now have a card that turns to face our mouse while the sheen effect moves in the opposite direction on top. This creates a nice, eye-catching effect.
How to make the best-animated websites? Pick the right animation tools!
1. ANIMATE.CSS
Animate.CSS has more than 60 animation effects, including almost all common animation effects. With this animation library, designers can easily and quickly create CSS3 animation websites.
2. MAGIC ANIMATIONS
Magic Animations is a unique CSS3 animation effect package that designers can use freely in their own website projects. Designers need only introduce CSS styles on the page: magic.css or the compressed version magic.min.css.
3. BOUNCE.JS
Bounce.js is a very powerful visual CSS3 animation code generation JS library plugin. You can edit various animation effects of CSS3 using their visual interface. In addition, Bounce.js can also be used alone to complete various CSS3 animation effects through JS code.
4. Mockplus
Mockplus is a web prototyping tool to create cool interactive websites with navigation bar switching designs and scroll-triggered animation effects.
Animation properties
To understand how animations work, start with an example of a pulsing icon, which may be used in a mobile interface to indicate what part of an application is selected. The animation continuously shrinks and grows one of the icons as it dims and brightens it. This simple example will illustrate several other features below:
(View live sample)
The animation CSS property specifies the name of an animation you will supply, pulse in this case, and its overall duration of 1 second. Both are required:
The infinite keyword indicates that the animation repeats indefinitely. If not specified, the animation executes only once.
The animation property is a shorthand that combines the values of others:
Animation properties are standard in many browsers, but as of this writing require prefixes for all WebKit browsers and older versions of Gecko and Opera. For widest support, you should define animation properties redundantly:
From here on, examples feature only the un-prefixed property names.
Рассинхронизируйте все движения
Очень часто, особенно если речь идет про бесконечные анимации с несколькими элементами, возникает необходимость их оживить, добавить неравномерность в общее движение. Если у вас такая задача возникла, то будет хорошей идеей немного изменить все длительности в анимации. Да, прям вот так, слегка их поменяйте, чтобы они все были разными. Больше ничего делать не нужно. Здесь стоило бы сказать, что длительности всех движений должны быть взаимно простыми числами, но по отношению к числам с плавающей запятой это высказывание будет немного некорректным.
Что это нам даст? Все очень просто – у нас рассинхронизируется вся анимация.
Этот совет, несмотря на свою простоту и очевидность, почему-то постоянно забывается и приводит к тому, что люди начинают сочинять очень сложные keyframes там, где можно просто рассинхронизировать длительности. Наверное это буквальное следования совету об использовании разных animation-timing-function. Они ведь такие, один раз попробуешь – и все. Вызывают зависимость. Не злоупотребляйте.
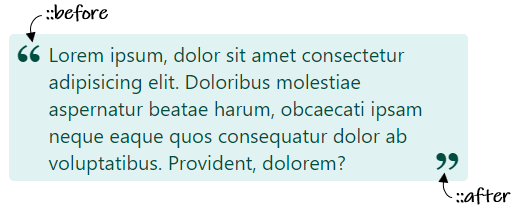
Добавляйте псевдо-хвостики
Возможно вы еще помните детские мультики. Там персонажи во время быстрых движений растягиваются в направлении движения или даже оставляют за собой фантомный след. Персонаж как бы раздваивается или размазывается и это выглядит довольно мило. Подчеркивает движения. Очень советую загуглить “12 принципов анимации” и посмотреть разные примеры, но мы сейчас остановимся на технической реализации такого следа. Как его можно сделать?
На первый взгляд может показаться, что сделать подобное в рамках CSS практически невозможно, особенно если элемент наполнен контентом, имеет фиксированную форму и его нельзя просто так растянуть. Но это лишь отчасти правда. Мы можем использовать псевдоэлементы размером с основной элемент (или немного меньше него) и перемещать их с задержкой относительно основной анимации.
Это может выглядеть как-то так:
Как видите, никакой магии здесь нет. Просто небольшая задержка. Она даст такой эффект, что часть элемента как бы не успевает за основным его объемом и постоянно его догоняет. Это может разбавить и оживить даже простое движение.
Пример с несколькими движущимися кружками:
CSS-переходы
Идея CSS-переходов проста: мы указываем, что некоторое свойство должно быть анимировано, и как оно должно быть анимировано. А когда свойство меняется, браузер сам обработает это изменение и отрисует анимацию.
Всё что нам нужно, чтобы начать анимацию – это изменить свойство, а дальше браузер сделает плавный переход сам.
Например, CSS-код ниже анимирует трёх-секундное изменение:
Теперь, если элементу присвоен класс , любое изменение свойства будет анимироваться в течение трёх секунд.
Нажмите кнопку ниже, чтобы анимировать фон:
Существует 4 свойства для описания CSS-переходов:
- – свойство перехода
- – продолжительность перехода
- – временная функция перехода
- – задержка начала перехода
Далее мы рассмотрим их все, а сейчас ещё заметим, что есть также общее свойство , которое позволяет задать их одновременно в последовательности: , а также анимировать несколько свойств одновременно.
Например, у этой кнопки анимируются два свойства и одновременно:
Теперь рассмотрим каждое свойство анимации по отдельности.